
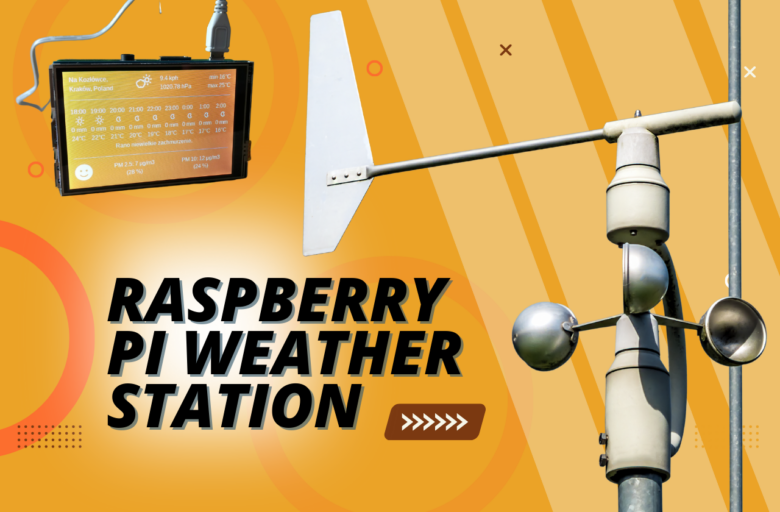
Do you want to monitor the weather in your area, but don’t have the time or resources to install and maintain a weather station? Check out our guide on how to build a Raspberry Pi Weather Station! This project is perfect for hobbyists and science enthusiasts who want to learn about weather patterns and monitoring.

- In this Latest IoT project,You will make an IoT Based Online Weather Station and Weather Instrument using NodeMCU board
- Locate your city in the source code,The NodeMCU pulls city's weather forecast data like temperature, humidity, pressure, wind speed,wind directional...
- The ESP8266 0.96'' OLED Board reads data from DHT-11 (temperature and humidity), BMP-180 (barometric pressure), and BH1750 (light intensity)...
- The ESP8266 0.96'' OLED has all features of traditional ESP8266 module,with same exact size and peripheral ports,offers seamless integration with a...
- This project is a wonderful project for IoT beginners who want to learn about retrieving data from an Online Internet server to NodeMCU board,get and...
- 【ECOWITT Wi-Fi Gateway Weather Station】: With bulti-in temperature, humidity, and barometric pressure 3-in-1 sensor, the Ecowitt GW1200 Wi-Fi...
- 【IOT Ready】: Ecowitt GW1200 Wi-Fi gateway could not only pair with all ecowitt-developed sensors and upload their data to the Internet after Wi-Fi...
- 【Various Sensors Supported】: GW1200 WiFi weather station gateway can collect sensor data from various Ecowitt-developed sensors(sold separately),...
- 【Easy to Install & Easy Wi-Fi Configuration】: Ecowitt GW1200 is powered by USB(2.0 or later). With a cable clip and a USB extension cable, you can...
- 【Upgrade Firmware】: According to your needs decide whether to automatically update the firmware. With the firmware update, you can use the latest...
- COMPLETE WEATHER STATION: (1) Osprey Sensor Array with Rain Cup, and (1) Brilliant, Easy-to-Read LCD Color Display
- AUTHENTIC HYPER-LOCAL DATA: Monitor your actual home and backyard weather conditions with our wireless and Wi-Fi-enabled sensor array measuring wind...
- SMART HOME READY: Set up alerts, access your data remotely, and program your home based on weather conditions using IFTT, Google Home, Alexa, and more
- ENHANCED WIFI: Enables your station to transmit its data wirelessly to the world's largest personal weather station network (optional setting)
- JOIN THE COMMUNITY: Connect to Ambient Weather Network to customize your dashboard tiles, share hyperlocal weather conditions via social feeds and...
- 【𝟲.𝟱-𝗜𝗻𝗰𝗵 𝗖𝗼𝗹𝗼𝗿 𝗗𝗶𝘀𝗽𝗹𝗮𝘆 𝘄𝗶𝘁𝗵 𝗔𝗱𝗷𝘂𝘀𝘁𝗮𝗯𝗹𝗲...
- 【𝗦𝗶𝗺𝗽𝗹𝗲 𝗜𝗻𝘀𝘁𝗮𝗹𝗹𝗮𝘁𝗶𝗼𝗻 & 𝗦𝗲𝘁𝘂𝗽】Installation is a breeze—simply mount the...
- 【𝗣𝗿𝗲𝗰𝗶𝘀𝗶𝗼𝗻 𝗥𝗮𝗶𝗻𝗳𝗮𝗹𝗹 𝗠𝗼𝗻𝗶𝘁𝗼𝗿】Our professional-grade rain gauge achieves...
- 【𝗖𝗼𝗺𝗽𝗿𝗲𝗵𝗲𝗻𝘀𝗶𝘃𝗲 𝗪𝗲𝗮𝘁𝗵𝗲𝗿 𝗠𝗼𝗻𝗶𝘁𝗼𝗿𝗶𝗻𝗴】The HD display clearly...
- 【𝗪𝗶𝗿𝗲𝗹𝗲𝘀𝘀 𝗧𝗿𝗮𝗻𝘀𝗺𝗶𝘀𝘀𝗶𝗼𝗻】The wireless transmission ensures stable connectivity across...
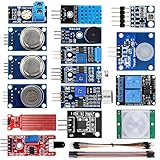
- SMART HOME LEARNING KIT--This kit combines the most common electronic components of smart home projects,developed specially for those beginners who...
- THE PROFESSIONAL SMART HOME KIT--This has 16 sensors modules and delicately selected sensors to detect temperature, humidity, sound, light, infrared,...
- THE MOST COMPLETE SMART HOME KIT--This universal kit are compatible for Arduino UNO R3 / Mega2560 / Mega328 /Nano / Raspberry Pi, it could DIY 16...
- HIGH QUALITY GUARANTEE--We eliminate many old-fashioned sensors which have low reliability and duplicate function as other sensor in the kit, the...
- DETAILED TUTORIAL ON OUR WEBSITE--Our website provide step-by-step instruction, detailed circuit connection graph/video, verified sample code and...
Contents
What is a Raspberry Pi Weather Station?
A Raspberry Pi weather station is a great way to learn about programming and data gathering. With a Raspberry Pi and an appropriate sensor, you can track temperature, humidity, rainfall, and more. This project can be done in a few hours, and you’ll have all of your data saved in a neat spreadsheet for future reference.
How to Build One
If you’re looking for a fun and easy way to track your weather conditions, you can build a Raspberry Pi Weather Station! This project is designed for beginners and only requires a basic understanding of electronics and Raspberry Pi.
To get started, you’ll need the following supplies:
- A Raspberry Pi
- An appropriate sensor (temperature, humidity, rainfall, etc.)
- A power supply (5V/1A or more)
- A microSD card (minimum 8GB)
- Some basic programming skills
Once you have your supplies, follow these steps to set up your weather station:
1. Insert your microSD card into your Raspberry Pi. Make sure the card is formatted as FAT32.
2. Power up your Raspberry Pi and log in using the default credentials (“pi” and “raspberry”).
3. Open a terminal window and type the following command to start the weather station:
4. Enter the following values for weather station settings:
- Location: The location where you want to track weather data. You can use a latitude/longitude coordinate or a street address. You can also specify a city or zip code if you’re tracking weather in a specific area.
- Unit of Measure: Choose Celsius or Fahrenheit. Celsius is the default unit of measurement. If you’re tracking temperature data, make sure to enter “Celsius” as the unit of measure.
A raspberry pi weather station requires the following items: raspbian image, an SD card, an LCD display, a matrix keypad, a power supply, and an Ethernet cable. Once you have all of the materials, follow the instructions below to get started!
How to use the Raspberry Pi Weather Station
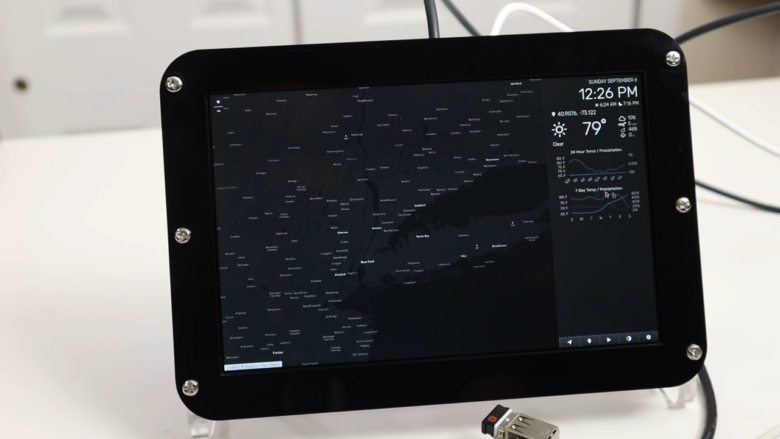
The Raspberry Pi Weather Station is a great way to learn about programming and how to use the Raspberry Pi. This project is very easy to set up, and you will be able to measure temperature, humidity, barometric pressure, and rainfall. It is perfect for learning about weather conditions, and it is also a great project for hobbies such as gardening or cooking.
To set up the Raspberry Pi Weather Station, you will first need to download the software from the official website. Once the software has been downloaded, you will need to unzip it. Next, place the files into a folder on your computer. Finally, create a file called “config” on your computer. This file will contain all of the information needed to set up the Raspberry Pi Weather Station.
When you insert an SD card into your computer, you can then copy the files from the “config” file onto this card. Next, you will need to put this card into your Raspberry Pi and power it on. After powering on the Raspberry Pi, enter the following commands into your computer:
“sudo raspi-config”
Once you have entered these commands, you will be able to select options related to networking and boot storage. Next, you need to select “Advanced Options”. Then select “Memory Configuration” and click on “Read-Write Memory Card”. After this has been done, select “Yes” to the question that asks if you want to create a new file system. Finally, select “Exit” and reboot your Raspberry Pi.
Once your Raspberry Pi has been rebooted, you can open the “config” file that was copied onto your SD card. Next, enter the following commands into your computer:
“sudo raspi-config”
“enable_uart”
“enable_camera”
After entering these commands, you will be able to enable various features of the Raspberry Pi Weather Station. For example, you will be able to enable the UART port and the camera port. Next, change the location of the config file. To do this, you will need to enter the following command:
“sudo mv config /boot/config.txt”
After this has been done, enter the following command:
“sudo reboot”
Finally, you will need to wait until your Raspberry Pi has rebooted. After it has rebooted, you can open the “live” monitor and start measuring the weather conditions.
Conclusion
If you’re interested in developing your own IoT projects, a Raspberry Pi weather station might be the perfect way to get started. This project is relatively easy to set up and requires very few materials, making it a great option for beginners.
By incorporating a weather station into your home automation system, you can monitor temperature, humidity, barometric pressure, and more. Not only will this information help you manage your home more effectively, but it could also provide valuable data that you can use to improve your climate predictions.
References:
https://www.instructables.com/RPi-IoT-Weather-Station/
https://www.twilio.com/blog/build-weather-station-with-php-python-raspberry-pi
Vesna is a staff writer and content editor at TheFrisky.