Cloning a Mac hard drive to another Mac allows you to create an exact copy of the original disk, including all its content and bootable macOS files. Whether you’re planning to buy a new Mac or simply want to create a backup, cloning saves all your data, settings, and applications to avoid the potential loss of invaluable data.
Here, in this article, we’ll discuss the step-by-step processes to help you know how to clone a Mac Hard drive to another Mac with ease.
Contents
Why You Need to Clone a Mac Hard Drive?
When you clone your Mac hard drive you create a backup of all its data to another location by creating a perfect, bit-by-bit duplicate of your files. Before you learn methods to clone a Mac hard drive, it is important to understand why you should clone a Mac hard drive. Some main reasons for the same are:
- Upgrade to a New Mac: If you are planning to purchase a new Mac and want to transfer all your data from your old Mac device to the new one, then cloning is the best option.
- Data Backup: Cloning allows you to have a complete backup of your data that you can use if any hardware failure or data loss occurs.
- Prevent Settings and Applications: Cloning creates the duplicate of all your settings, applications, and files that you can configure on your new Mac.
What Are the Pre-requisites to Clone Mac Hard Drive?
Before you clone your Mac hard drive, make sure you have the following:
- Two Macs: One source Mac and one target Mac, i.e., the device from where you need to clone the data and where you want to clone the data, respectively.
- An External Hard Drive: You must have an external hard drive with storage capacity to store the entire contents of your source Mac’s hard drive.
- Internet Connection: If you have to install any software or update during the cloning process, it is important to have a stable internet connection.
- Time Machine Backup (Optional): It’s always a good practice to create a Time Machine backup of your source Mac’s important data before you proceed to clone the Mac hard drive.
Quick Steps to Clone a Mac Hard Drive
Here are some simple steps that you need to follow for Mac hard drive cloning. Just go with these steps one-by-one to clone your Mac hard drive to another Mac:
Step 1: Backup Your Data (Optional)
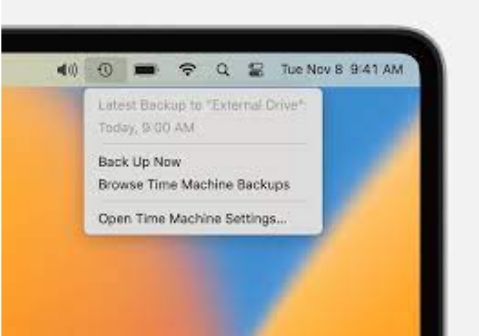
Before you clone your Mac hard drive, it’s a good practice to back up all your stored files and folders to an external drive. You can use this backup if any data loss occurs during the cloning process. You can use Apple’s built-in Time Machine backup to create incremental backups of your files. To create a backup of files on your Mac using Time Machine, you need to:
- Connect your Time Machine backup drive to the Mac that you have to clone.
- Navigate to “System Preferences” > “Time Machine” and then set up your backup preferences.
- Tap the “Back Up Now” button to create a backup of your data.
Step 02: Connect and Prepare the Target Mac
After the successful creation of the backups, you need to connect your target Mac to the source Mac using an Ethernet cable or via a WiFi Network. Once the proper connection is established, turn ON your target Mac and enable File Sharing.
For this, go to System Preferences > Sharing and enable File Sharing. This option allows the source Mac to access the hard drive of the target Mac.
Step 03: Clone Mac Hard Drive Using Disk Utility
You can use Apple’s built-in utility, Disk Utility to clone a hard drive on your Mac. You need to follow the below-given steps to know how to clone a Mac hard drive to another Mac using this free cloning option:
- Launch Disk Utility. For this, press the Command + Space bar simultaneously and then type in Disk Utility in the Spotlight Search.
- Once Disk Utility is launched, select the backup drive where you want to clone your Mac hard drive and then click the Restore button.
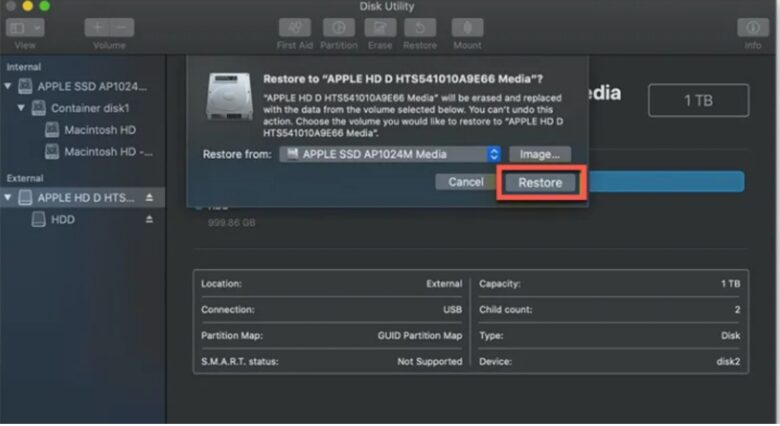
Now, Disk Utility will display a new “Restore From” window. Choose your Mac SSD from the drop-down menu then click the Restore button to start the cloning process.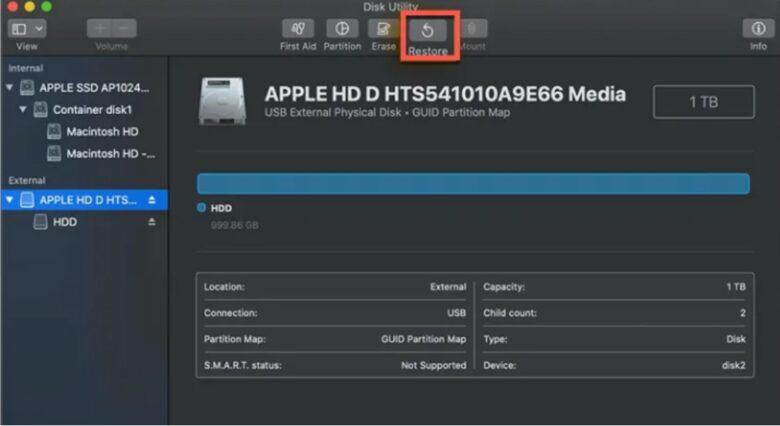
- Wait till Disk Utility completely clone your drive. After completion of the cloning process, click the Done button to complete the process.
How to Restore Data Lost During Mac Hard Drive Cloning?
Instances may occur when you lose important files from your source Mac while cloning its hard drive. In such cases, you can use professional Mac data recovery software to restore deleted files easily. Among several Mac data recovery tools, we recommend using the Stellar Data Recovery Professional for Mac because of its amazing features and easy-to-use interface. The GUI interface of this recovery software is so simple that even beginners can use it to recover lost or deleted files in no time.
The software support the recovery of deleted documents, photos, videos, audio, and other type of files from crashed or non-booting Mac devices. If you encounter data loss issues while cloning your Mac hard drive to another Mac, you can go through the below-given steps to recover lost files using the this tool:
- First, download and install the software on your device.
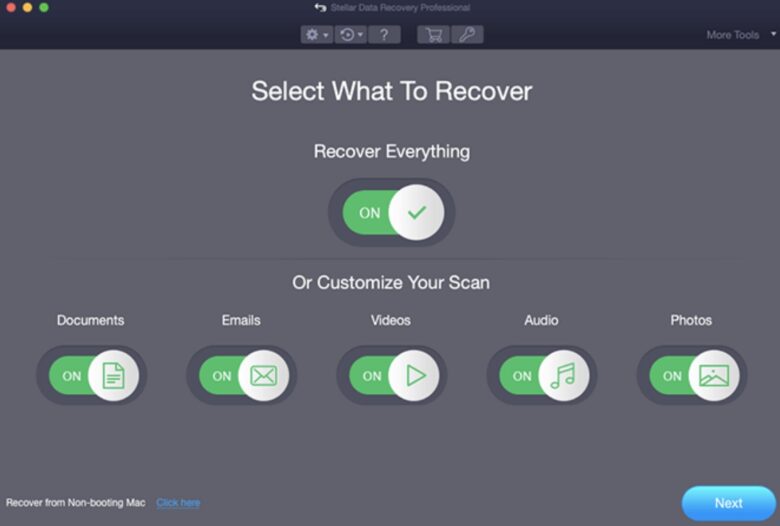
- Launch the software and from the from the Select What to Recover window, select the type of file that you need to recover and click the Next button.
- Now, select the storage location from where you need to restore lost files and tap the Scan button.
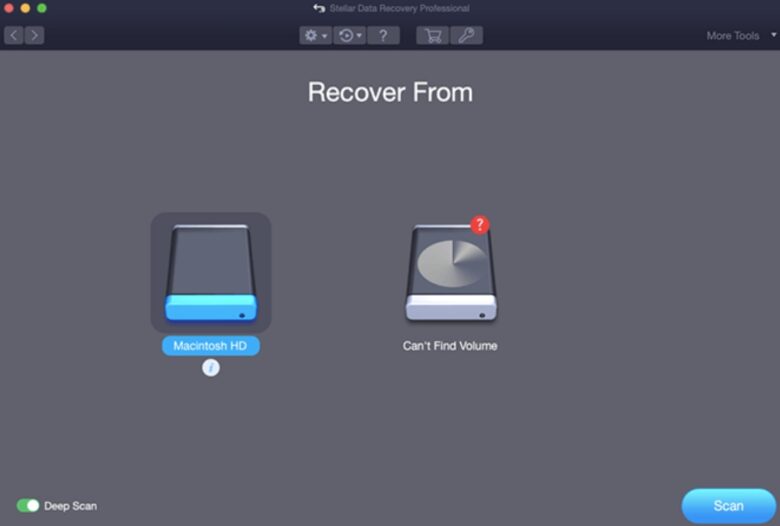
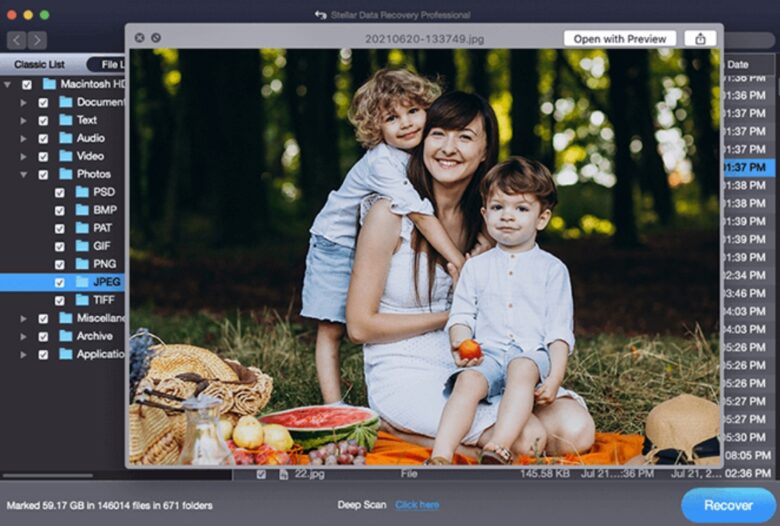
- After completion of the scanning process, preview the recoverable files and select the one that you need to restore and tap the Recover button.
Wrapping Up
Cloning a Mac hard drive to another Mac can be a very helpful process, especially if you are planning to upgrade your Mac or create backups of its content. By following the aforementioned steps and using the right tools, you can easily clone your Mac hard drive to another Mac. Remember to create proper data backups to avoid data loss issues during the cloning process. Even if you don’t have any backup, you can use data recovery software for Mac, to restore deleted or lost files. It’s a great recovery software for all Mac users, must give it a try!
