Many landscape photographers often face the question, “How can I make my photos more interesting and spectacular?”
In this article, I would like to share shooting techniques that will help to make your shots more interesting. And mind you, they do not require a big investment! In my photos, I always try to show the uniqueness of the moment and the place where I am shooting. To do this, I have to work carefully with the composition and often shoot in difficult weather conditions. I believe these two factors make a photo interesting for the viewer. The composition allows you to capture the viewer’s attention and immerse him in the shot, while the weather puts him in the photographer’s place.
Thus, looking at the picture, the viewer begins to experience emotionally the same as the photographer at the time of the shooting. It is difficult to achieve this effect. Many photographers, such as the talented photographer Alexander Vershinin, are constantly improving, learning new techniques and compositional landscape photography methods.
When shooting landscapes, I am constantly faced with different situations that require unconventional solutions. Most of the time, it depends on the weather conditions at the moment of shooting and the location of the objects that I would like to capture in the photo.
Composition in landscape photography
Let’s start with composition: I would like to tell you about a technique that helps you to expand the boundaries of the frame. In my photos, the lower part is almost always taken by objects that are the logical “beginning” of the picture – the so-called foreground. This is necessary so that the photo looks more harmonious and there is no space below. Usually, such objects are flowers, stones, waves crashing on coastal rocks, and much more. Imagine: you are standing on the shore of a small lake, where grass grows, and stones look out of the water, and in the background, you can see a freestanding peak. It can be hard to get all these objects in one shot, even with super wide-angle lenses. We recommend the best landscape photography training at iphotography.com.
If you want to take such a shot, a good solution is to use a vertical panorama or, as it is also called, vertorama. You have to hold the camera horizontally and move it around the vertical axis from top to bottom or vice versa, making frame by frame. You need to be careful and overlap the previous frame by at least 30%. And in cases when the foreground is very close to you, I advise you to overlap 40-50% to avoid frame inconsistencies when сutting.
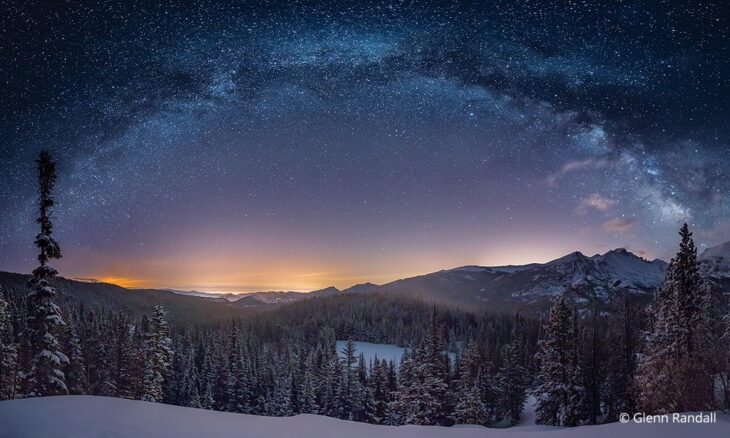
Now imagine a wide view of the valley in front of us, but the focal length to cover everything in one frame is not enough. In this case, horizontal panning will help, which allows you to make a 180° “turn” of the valley. Probably many people have seen long and narrow shots in which a 180-360 ° view is placed. It does not always look beautiful, and such a shot is difficult for the viewer to perceive due to its excessive fullness and perspective distortion.
Therefore, I do not advise you to overuse panning to make the frame unusual. When I make a horizontal panorama, I put the camera vertically and move it horizontally, making frame by frame, not forgetting about the overlap of 30%.
While the panning allows you to fit everything in one frame, there is another big advantage of using this technique. Since the photo consists of 3-4 or even more frames, its detail increases, which will affect the viewers’ perception for the better. It is always interesting and pleasant to look at the picture with the smallest details.
Focus stacking in landscape photography

Source: improvephotography.com
To better understand the essence of this technique, we need to remember the example again with the mountain lake and flowers in the foreground. Imagine that you want to photograph flowers in the foreground overlooking the mountain at this moment. So how do you do that if the flowers are very close to the front lens?
In this case, the first thing you will try is to clamp the aperture to its maximum or close to it. But even then, you won’t be able to focus on both the flowers and the mountain simultaneously. Let’s figure out what to do.
I only use this technique when the foreground subjects are very close to the front lens, and it is impossible to focus on the background and foreground simultaneously, even using large apertures. You have to make exposures after each shift of the focusing ring. If you are inexperienced, I advise you to put your camera on a tripod and use a cable release or release timer. Thus, the chances of making a mistake when shooting with focus stacking will be minimal.
Before you use this technique, you should ensure that the objects in the frame are not moving or shifting too much.
Another technique of focus stacking in landscape photography
There is another technique that not many people use. Therefore, this technique is for those who shoot and are not afraid to be called a “photoshoper.”
The essence of this method is to shoot a scene at different focal lengths and then combine the images in the editor.
Why is it necessary? The reason for using this technique is that the distant subjects get too small at the focal lengths at which the foreground is shot. You have probably noticed that the main subject, which is usually at a distance, becomes too small in comparison to the foreground when you are composing a shot—provided that you are going to shoot everything with a wide-angle lens.
So what did you do in that situation? Either you shoot as it is, completely losing the meaning of the frame, resulting in a photograph with disturbed balance and proportions of objects, or you don’t shoot at all, which is even more offensive. Isn’t it?

Source: outdoorphotographer.com
You can avoid these problems, and I’ll tell you how. First, the entire frame is shot in the form we would like to do it initially. Looking at the resulting shot, we see that the main subject in the frame is small and does not look like a priority. This is because it is at a great distance from the shooting point—the next step. We need to take a second frame to shoot the main object of the desired size. To do this, bring the scene a little closer with the zoom and, if necessary, raise the camera a little, building up the composition. Thus, the main object will be of “normal” size in the second shot. At the same time, we will lose the beautiful and voluminous foreground as in the first shot.
As a result, we will get two pictures, from one of which we have to take the bottom (the foreground and the middle ground) and from the other one – the top (our main object) and combine them in the photo editor with the help of masks to get a complete and balanced picture which we wanted.
The described methods help achieve the result I described at the beginning of the article. My photos become more interesting and effective at photographing before using Photoshop.
The most important thing that I always draw the attention of everyone I have to shoot is understanding what you are shooting and why. Once you understand this, you’ll have no problems choosing a shooting method.

