Installing a rear derailleur on your mountain bike is something that can be done quickly. The steps on the whole process do not need a professional to do what you can make on your own. There are lots of reasons why you need to change the rear derailleur. No matter the reason, you have to know how to do it and do it right. The rear derailleur is an essential accessory of the mountain bike. It’s the mechanism that moves the chain from one gear to the other. To know how to install the rear derailleur correctly, we have covered the process for you. For you to change the rear derailleur, you have to have some tools with you. On a blog like BikeHungry, you can see the right type of mountain bike review with a buying guide.
- A Philips screwdriver
- Chain brake tool
- Bike hand
- Set of Allen keys

Source: bike-components
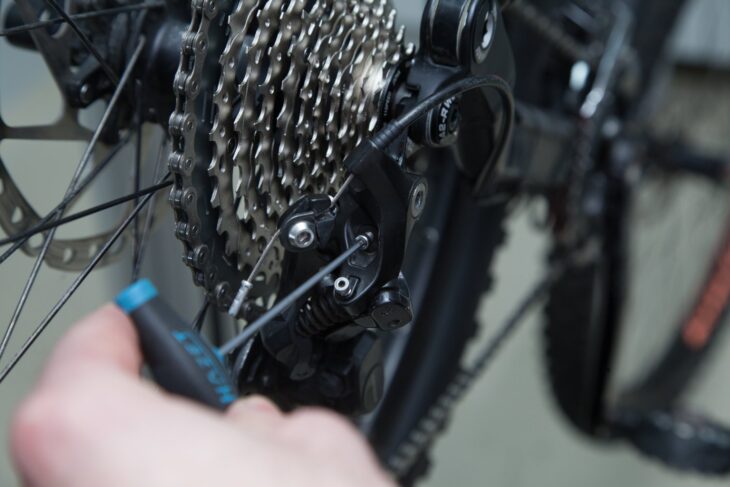
Before you even start installing the new rear derailleur, you have to check on the old one. This is to make to make sure you need a replacement or not. For this, you have to look at the jockey wheels and ensure they are not broken. If you want to fit a new rear derailleur, you need to remove the old one first. This is common knowledge and a step that you won’t miss. To do that, you have to put your bike into a stand then shift the chain into the smallest sprocket. Then you have to disconnect the shift cable by pulling off the shift cable end cap and loosen at the cable pinch bolt. You then have to remove the shift cable from the derailleur. The step is not hard to do and takes a few minutes to handle.
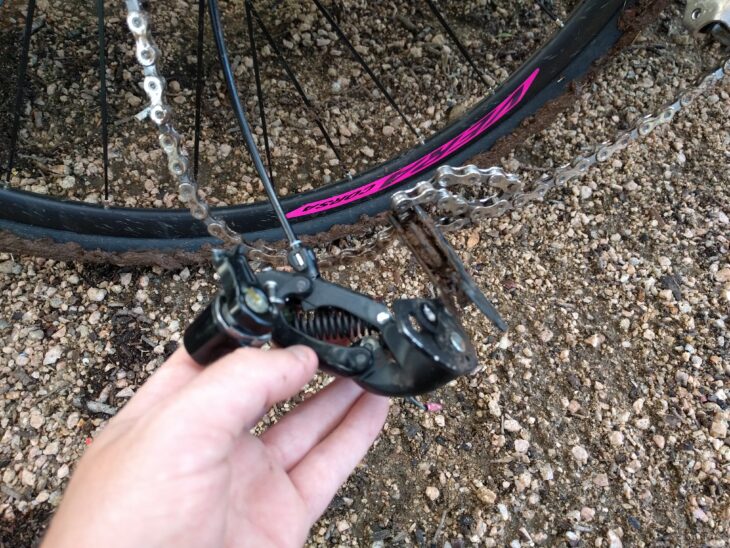
The chain has to be removed from the derailleur. It’s not complicated, even if it’s your first time.
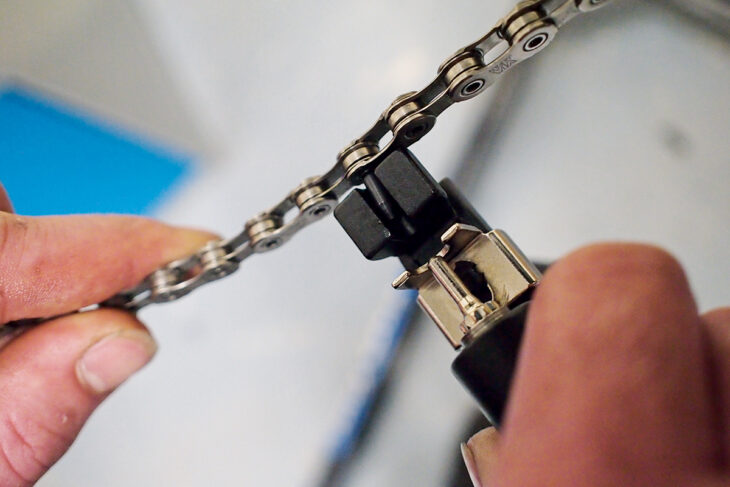
You have to find the master link in the chain. This is because it’s a quick-release link and becomes much easier to connect the chain and disconnect without the need for a chain tool. If the chain in your bike does not have a master link, then you will need a chain tool to take care of it. There are cases where some bikes do not come with a master chain. To remove the rear derailleur, you need to turn counterclockwise to unthread the mounting bolt. With a few steps, you can remove the old chain.

Source: Cyclist
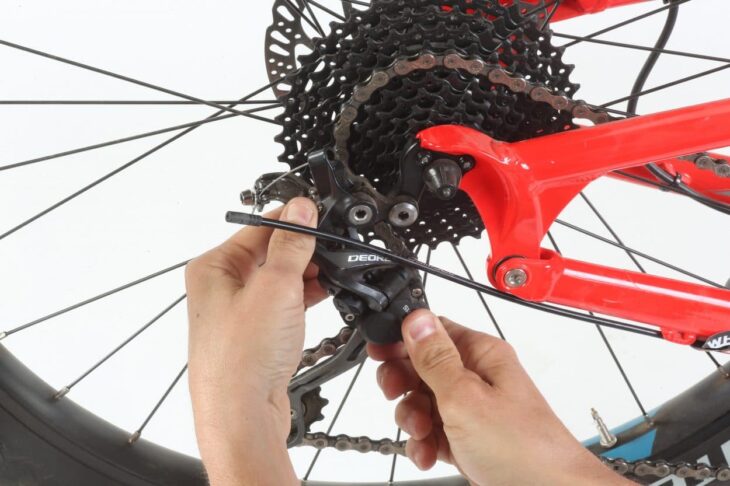
When done with the old chain, then it’s time to install the new rear derailleur. The 1st thing you want to do is check the current derailleur hanger to make sure it’s in good shape. Ensure the threads are not damaged, and if damaged, ensure it’s fixed to proper condition. The first thing is to mount the derailleur to the mounting bolt going anti counterclockwise. It’s easy to do and when done, tighten the mounting bolts fully. Check the chain and put it back on, following the simple procedure you used to remove.
Put the shift cable back into the derailleur, then pull it tight. Tighten the anchor bolt to make sure the line is flattened well. When you are done replacing the old derailleur, you need to go a step further into making sure it’s well-placed. Having it wrongly placed may lead you to do it again and again later. You have to adjust the rear derailleur. When you change the derailleur, limit the lower and the higher ends of the screws. This is to prevent the rear derailleurs from moving to more than the set limit. This happens sometimes, and the chain keeps getting off while riding. This is the last step you require to take for the chains and the links.
When you are done with the setup and adjustment, you have to test the bike to see if they are well installed. If the bike is running as required, you have done an excellent job. If not, then repeat the procedure. This is to ensure you are on the right track and not mess up the bike adjustment and setting. Testing the bike allows you to correct where necessary on the spot.

Source: Bike Forums
Why The Rear Derailleur Breaks
For you to change the rear derailleur, it must have broken. There are so many things that may cause the derailleur to break. This is a normal procedure or happening in the cycling world. There are something’s you have to know and understand as a bike owner. You may have over the shift to spokes which in turn break the rear derailleur. This happens when the lower limit has not been set correctly on the bike, which leads it too far beyond the largest cog. Make sure the lower limit is well done to avoid some of the problems later. Also, another reason why it may have broken is due to the hanger being bent from an accident.
The derailleur may be too old, and accumulative wear and tears may have caused it to fail hence the need for a replacement. You have to do it when you buy a bike to make sure the derailleur is good. Sometimes it may come with a defect, or it’s cheap and may break easily. When you buy the bike, you have to look carefully at the bike and inspect its features to see if they are in position. This is to avoid some of the defects the bike comes with, like a broken rear derailleur.

Source: Mountain Bike Action
When exposed to moderate vibration of the ride, then it breaks. For the reasons why the rear derailleur breaks, there are tons of them. It does not matter why it breaks, but here we have to know how to install a new one. The steps that we have discussed above on how to install a rear derailleur on the mountain bike are all important. You need to understand each of the steps well to do it on your own. As we saw it, changing the rear derailleur is not a hard thing to do. With the information provided above, we hope it’s helpful to you.
