We all want to look our best in photos, but sometimes you don’t have the time (or the possibility) to take 20 pics and choose the perfect one.
Photo retouching, especially for social media, is not about looking perfect. It’s about feeling good about the image you release to the public and making sure your photos are worthy of praise.
Plus, a bit of editing can add depth and contrast to a photo, which is a great way to stand out and attract the eye of your audience. But the best touch-ups are the ones that are hard to identify without knowing a bit about photography and editing techniques.
So, if you’re new to all of this, here are a few tips to help you improve your Instagram game and attract more followers.
Contents
1. Remove Blemishes from the Skin

Source: perfectcorp.com
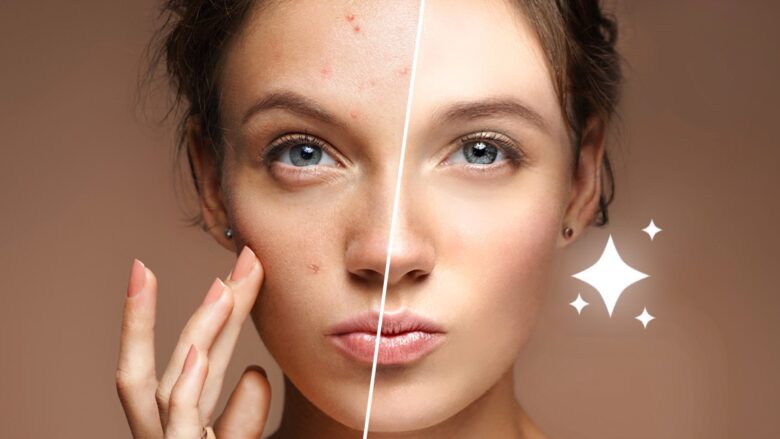
It often seems that pimples, sun spots, and other blemishes are always ready to star in photos, whether you’re getting your passport renewed or taking a one-time selfie with the pyramid of Giza in the background.
But you shouldn’t let such small things ruin amazing moments. Sadly, we can’t help with the passport photo, but we can help with the selfies. All you need is a free photo editing app that has a blemish removal tool. This feature can either blur the blemish or removes it completely by copy-pasting some healthy skin on top of it.
Also, you can brighten up your skin in real life by changing your skincare routine. However, this is something that takes time, and it doesn’t guarantee a no blemish skin all the time.
2. Use a Slimming Tool
No, it’s not to make you look slimmer (although you can use it for this purpose if you really want to). This slimming tool is great for reshaping various subjects, correcting distortions, or fitting more details into a predefined frame (among others).
The great thing about such a tool is that you can make small corrections without having to reframe or reshape the objects/subjects around the item you’re changing. It’s also easy to use, and everyone can use it.
3. Whiten Teeth

Source. dpmag.com
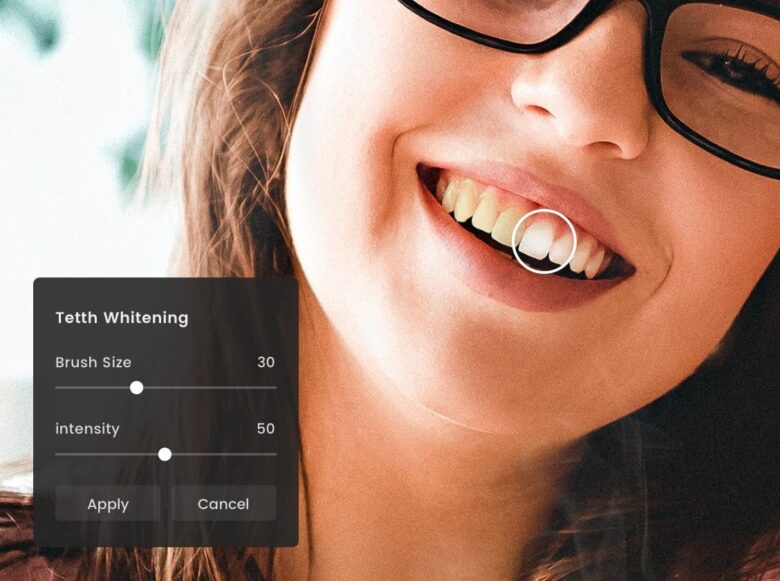
This one is such a simple trick that it’s easy to ignore. However, a few shades will give you or your subjects a brighter smile, which makes the pictures more eye-catching. Of course, this doesn’t mean your teeth are not white enough in real life. The colors we see in pictures are directly influenced by the type of camera and lens you are using. Also, the lighting plays an important factor.
Of course, there are a few tricks to make your smile more photogenic before taking the picture. This way, success is almost guaranteed, and there won’t be much need for editing.
4. Play With Contrast & Brightness
This trick works on a wide range of photos, from selfies to nature photography, because it allows you to highlight the areas you want people to see. Now, most free tools out there have some sort of contrast and brightness features, and these work great for slight edits.
Play with brightness to highlight a body of water or the eyes of your subject. Still, don’t add too much brightness – you don’t want your photos to look burnt. Contrast, on the other hand, is great for either sharpening details or smoothing out areas that are too sharp.
5. Use the Grid

Source: fotor.com
If you like taking photos, you’ve probably heard of the rule of thirds. You can apply this composition guideline to create more compelling images by placing the subject in the left or right third of the image. This leaves two-thirds of the image free to include other elements, such as the landscape, or give the viewer a peek at what was going on at the moment the photo was taken.
This rule is easy to apply because most camera viewfinders and smartphones have “the grid,” which uses vertical and horizontal lines to divide the screen into nine equal zones. But you can also use this feature to break the rule of thirds and get a bit more artistic with your photos.
Overall, it’s good practice to learn how to use this type of composition and then move on by breaking it.
6. Make Your Images More Artistic
Until now, we’ve talked about fixing your photos, but you can also use various editing tools and filters to make an image more artistic.
Think of the classic black-and-white fall landscape that stands out due to the one tree that has yellow/red-brown leaves. By simply turning down the noise (the black-and-white background) and intensifying the colors of the leaves on just one tree, you create a beautiful work of art that attracts the eye.
The same goes for the light – you can use it to highlight your photo’s subject and guide the eye through the image. This can be achieved with filters, photo effects, or by simply adding light (which is a bit more advanced).
7. Tricks to Get the Best Lighting

Source: mylampdepot.com
Natural light is the best source for high-quality photos, but there are times when it’s too harsh (in the summer, for instance) or too low (in the evening or on low-visibility days). Luckily, most cameras and smartphones have tools that let you deal with lighting that isn’t optimal.
For instance, if you’re shooting in dim light, you can use the HDR mode on your camera (smartphones also have this feature). HDR stands for high dynamic range, and it helps catch more detail when in the shadows and highlights. It also works great for portraits or close-up photography.
Another way to get the best lighting is to use a light reflector to direct the light where you want it to be. And don’t shy away from taking the same shot a bunch of times with different lighting settings. This way, you’ll have plenty of options when it comes to editing.
Wrap Up
A few retouches can help salvage photos and make them social-media-worthy, so don’t be afraid to use the tools at your disposal. But make sure to practice beforehand because it’s easy to go overboard, especially with blemish removers or slimming tools.
